At Man Group we use Python, a high-level programming language which combines ease-of-use with extremely powerful projects such as pandas, SciPy, and JupyterLab. To facilitate writing Python, the JupyterLab framework allows users to write code in a "notebook" and immediately interact with the results. This is especially useful when performing exploratory analysis, as it allows for easy modification and sharing of results. However, once a JupyterLab user is satisfied with the output of the notebook, it is quite difficult to convert this notebook into a flexible and high-quality report. This is where Notebooker comes in! With the introduction of the Notebooker project, in a few clicks a Jupyter Notebook can become an on-demand report. With the latest update to Notebooker, it is possible to take this a step further and schedule reports to be run on an ongoing basis.
Notebooker allows users to deploy their own work using simple git pushes, immediately relaying the changes to Notebooker's web front end, and allowing for on-demand running of the notebook. This allows us to transform a static, one-off Jupyter Notebook into a "Notebook Template" upon which future reports can be executed and parametrised. For example, a report which produces a chart for AAPL US could be parametrised to take any given ticker and produce the corresponding chart. In a very short amount of time, a set of reports for an entire portfolio of tickers can be produced from one Jupyter Notebook within a few clicks. The rendered PDF or HTML results can also be sent via email upon completion. As an added benefit, you can toggle whether to see the underlying code in the final output, which means that the final output is free of code but experts can dip in and investigate the methodology if they so choose.
This has proven to be a very useful tool within Man Group and has been used in several different situations, ranging from simple support dashboards to fully-fledged portfolio management solutions. However, in order to further enhance these reports and to use them on an ongoing basis, it was necessary to schedule reports using external solutions such as Apache Airflow and Jenkins. With the introduction of Notebooker version 0.4.0, it is now possible to schedule reports to be run from within the webapp on a regular basis.
Scheduling your Notebooks
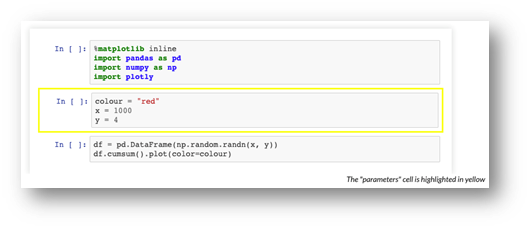
To schedule a Jupyter Notebook as a report, we need a Jupyter Notebook and a Notebooker webapp. To set up an instance of the Notebooker webapp with your first Notebook, follow the setup, steps add your Notebook, and optionally add a "parameters" cell.
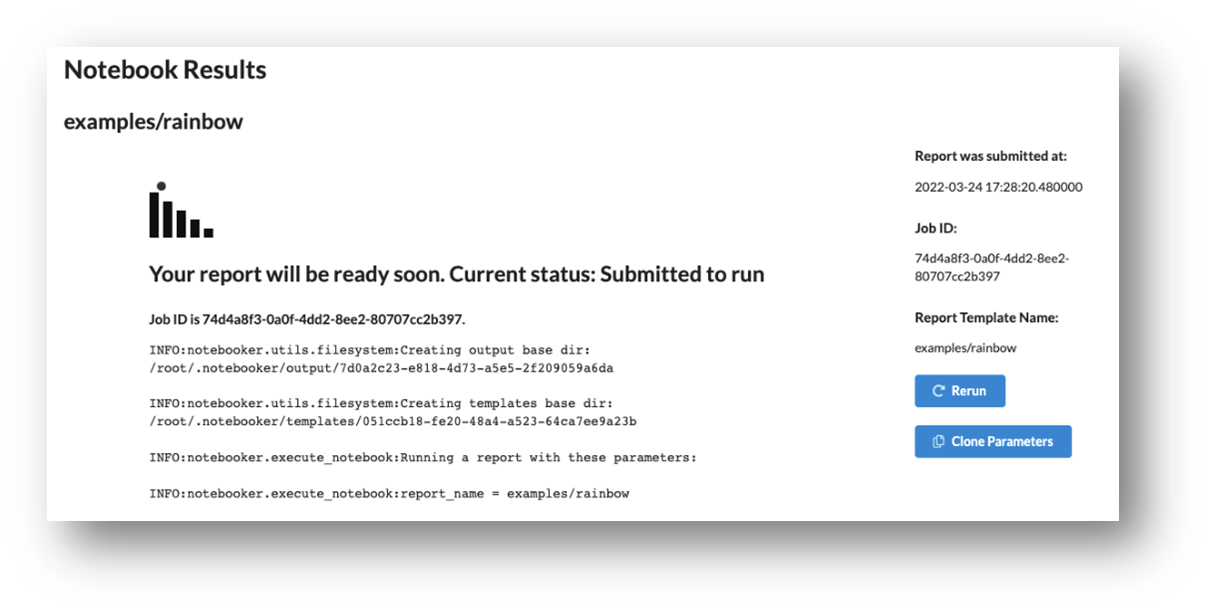
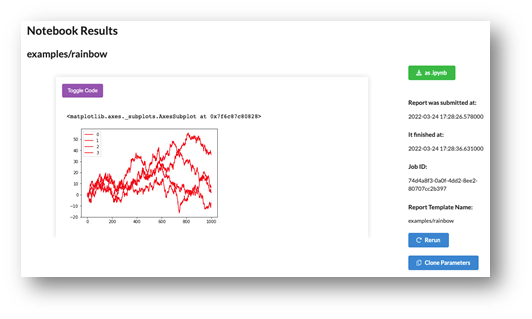
From your Notebooker instance, click "Execute a Notebook", select your Notebook name, and run the report. You should soon be presented with the results (or errors which need to be fixed!).
Once you are happy with the output, it's time to add a schedule using the new Notebooker Scheduler, accessible from the "Scheduler" button in the top toolbar.

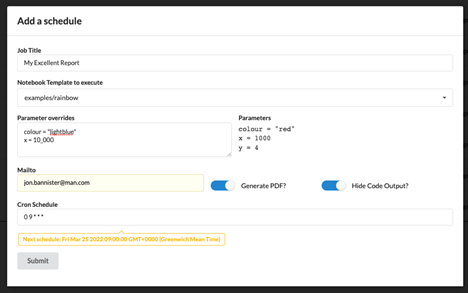
You will now be presented with the Scheduling screen, which provides a handy overview of all schedules on the current Notebooker webapp. To create a new schedule, click "Add a Schedule" on the left of the screen. The first thing to do is to select a title for the recurring report: this will be important when referring later on to different schedules, but also it will be the title of the exported PDF version of the report - so choose wisely!
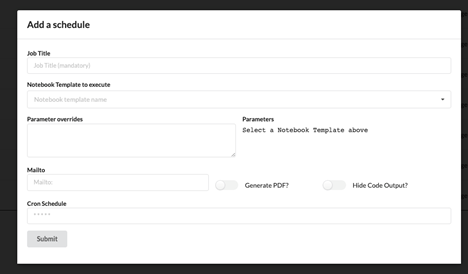
Once this is done, you need to select a Notebook Template to execute. This will be the relative path of the notebook template within the notebook template’s git repo. In the images of this article, we are executing templates from the `examples` directory. Having selected a Notebook Template, the default parameters of the report will be populated below. These can be overridden by writing simple python that assigns values to variables. Following this, you can choose how the report is distributed beyond the webapp itself; whether you want the report to be emailed, generated as a PDF, or even to hide the code output within the generated PDF.
Finally, and most importantly, you choose the schedule using cron syntax. A little popup will inform you of how Notebooker will interpret these instructions by illustrating the next time the report will be executed by the scheduler. Once you're happy, hit ‘Submit’ and you will be returned to the scheduler screen.
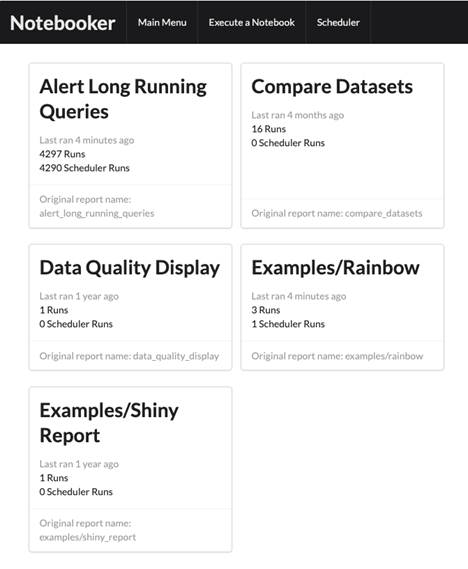
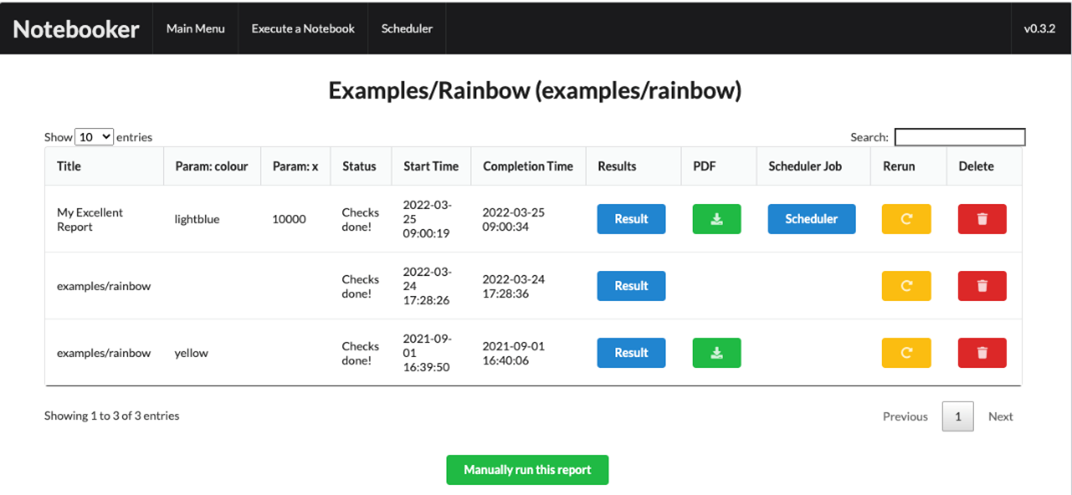
When the scheduled report has finished running, you will be able to access it via the main screen - something which has also been significantly reworked with the latest Notebooker update. Now, you are presented with a choice of report templates for displaying results. It's also possible to see how long ago the last report was executed, and how many of those reports were manually run as opposed to being run by the scheduler. When the card is clicked, you are now shown a more detailed screen with job runs, information on the parameters which were used to execute the report alongside helpful links to the scheduler and a PDF render of results. As an additional feature, it is possible to get a permalink which will guide users to the latest run of the report and parameters as specified within the URL.
How you can get started
If you already have a Notebooker instance, upgrade to version 0.4.0 or later to get all these benefits. A complete list of enhancements and bugfixes is available here: https://github.com/man-group/notebooker/releases.
If you don't have Notebooker yet, check out the docs at https://notebooker.readthedocs.io/en/latest/ for an in-depth guide.
Check out Notebooker at https://github.com/man-group/notebooker and don't forget to leave a star if you liked the project!
You are now leaving Man Group’s website
You are leaving Man Group’s website and entering a third-party website that is not controlled, maintained, or monitored by Man Group. Man Group is not responsible for the content or availability of the third-party website. By leaving Man Group’s website, you will be subject to the third-party website’s terms, policies and/or notices, including those related to privacy and security, as applicable.